After completing the Setup Wizard and adding the necessary VMs to be monitored, CloudMonix will automatically, as a part of its default setup raise alerts if any of the drives have less than 1GB of free space left.
If it is necessary to raise alerts using different criteria or if you’re not yet monitoring VMs with CloudMonix, follow the following steps
1. Run CloudMonix Setup Wizard to connect to your Azure environment
If you aren’t using CloudMonix yet, sign up for a free account, then authorize CloudMonix to view your Azure subscription with Azure VMs. Learn more about the setup process here.
2. How to modify the threshold of the alert condition to be a different amount
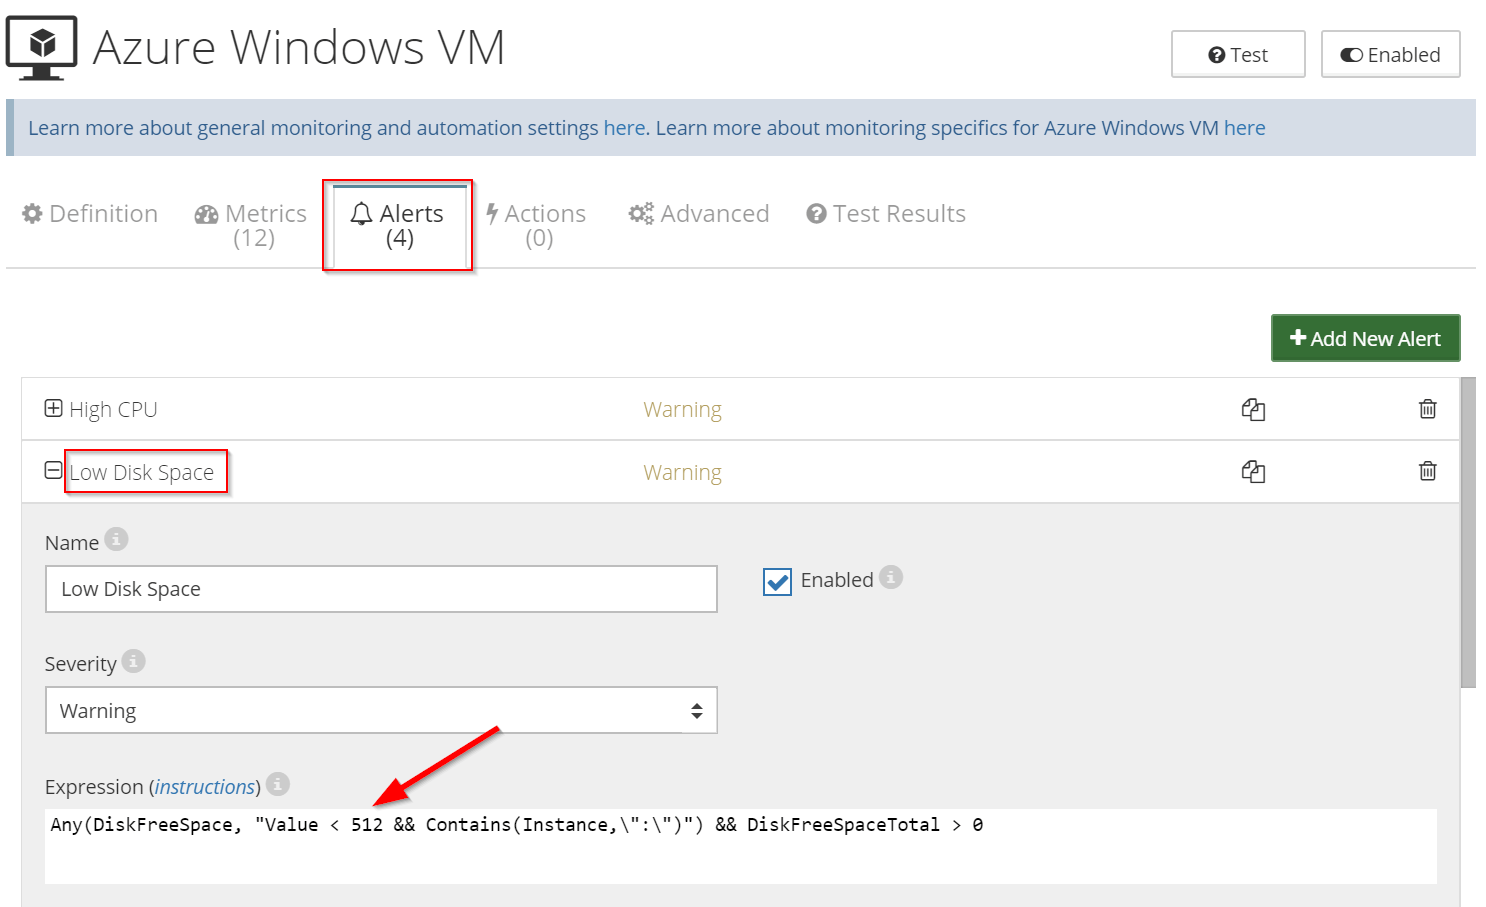
When configuring monitoring for a new Azure resource, users may use provided default templates that include popular metrics, alerts, and auto-scaling rules. The default template for monitoring Azure Windows VMs contains a “Low Disk Space” alert which is raised whenever the free space on any individual disk is below 1GB.
To modify the threshold value:
- In the VM Configuration Dialog, go to the “Alerts” tab and open the “Low Disk Space” alert editor.
- Replace the threshold value (1024) in the alert condition with the desired value, e.g. 512. Note that the value is expressed in MB.
- Note: it is important to keep the condition verifying DiskFreeSpaceTotal in place, as it guarantees that this alert will function properly only when metric data is present.
- Contains sub-expression ensures that CloudMonix only tracks volumes with assigned drive letters and ignores any system partitions.

3. How to raise alerts on a single specific drive (or drives)
In certain situations, it may be also desirable to also track free disk space of particular disks. The definition of an alert tracking low disk space of an individual disk is very similar to the “Low Disk Space” alert included in the default template.
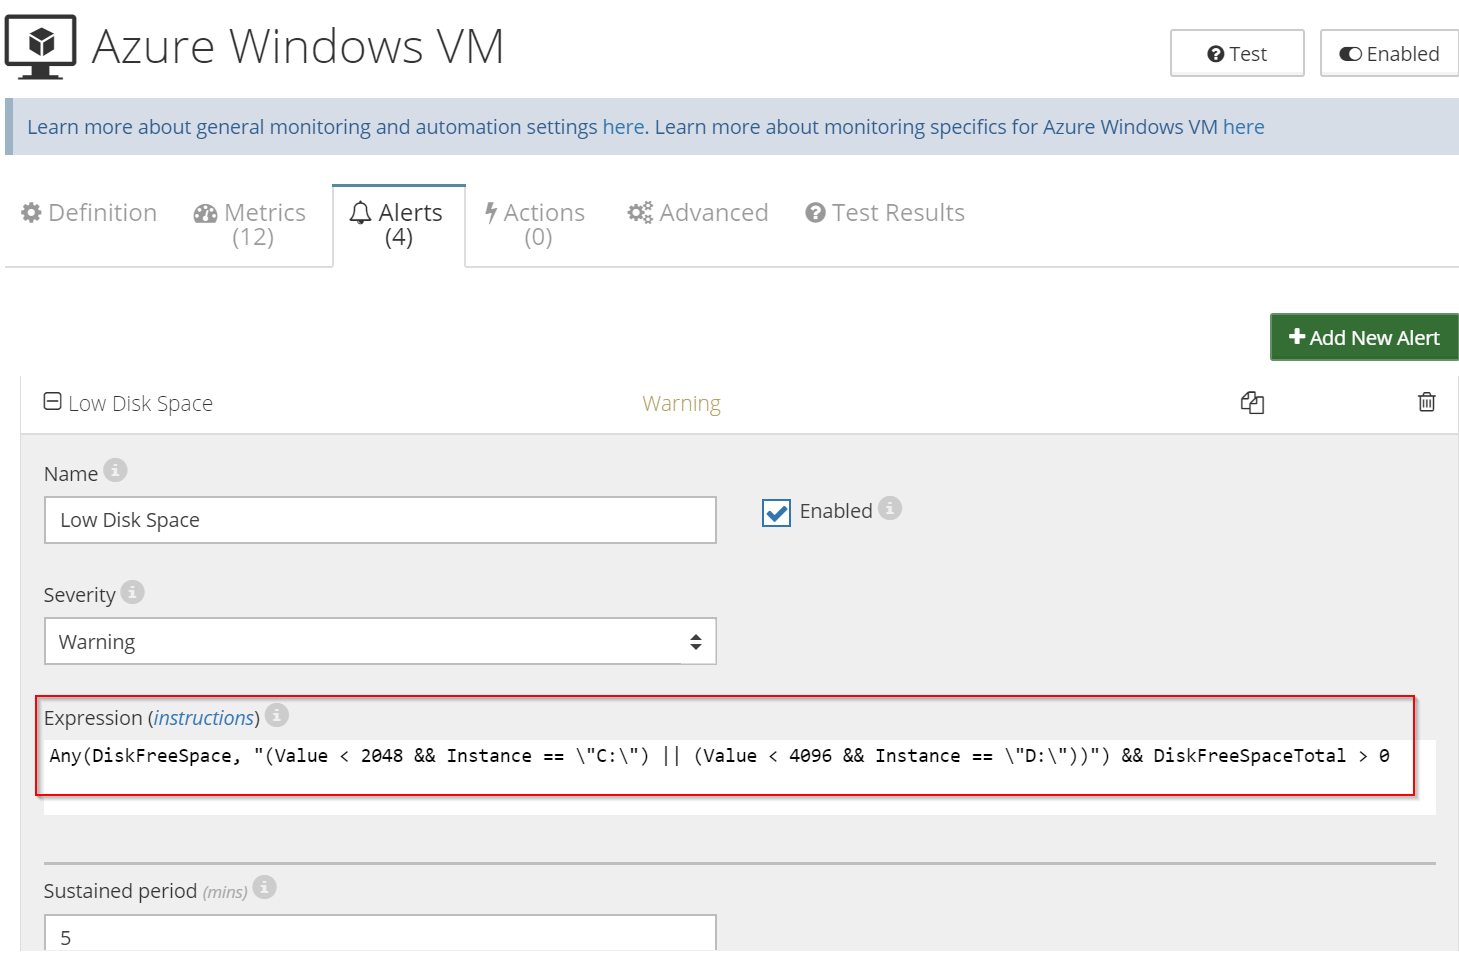
To define a custom alert for disk C:
- Go to the Alerts tab and click the “Add New Alert” button.
- Ensure that the Enabled checkbox is ticked.
- In the “Expression” textbox, type the following condition: Any(DiskFreeSpace, “Value < 2048 && Instance == \”C:\”)”)
- Conditions may be extended to cover multiple disks with different thresholds at once:
Any(DiskFreeSpace, “(Value < 2048 && Instance == \”C:\”) || (Value < 4096 && Instance == \”D:\”))”) - Specify an alert name and save.
- Note: it is important to keep the condition verifying DiskFreeSpaceTotal in place, as it guarantees that this alert will function properly only when metric data is present.
To learn more about expressions used in alert conditions read this article.
In this article, we described how to modify alerts in default template for Azure Windows VMs. The templates for Azure Linux VMs and Azure VM Scale Sets can be adjusted in the same way. To learn more about CloudMonix capabilities, read this article presenting how to monitor and automatically restart crashed Windows Services.


Leave A Comment