Scheduling starts and shutdowns of Azure Virtual Machines without PowerShell
In this tutorial, we’re going to learn how to Shutdown and Start cloud-based Microsoft Azure Virtual Machines on a schedule. The process takes about 1-2 minutes and is easily replicable to any and all VMs in your Azure subscription in just a few minutes more. It works for Windows and Linux VMs and does not rely on somewhat complex and hard to maintain PowerShell scripts or Azure Automation runbooks. Also, if any errors occur during either start or shutdown of VMs, you will get an immediate notification.
If you have production Azure VMs that need to remain up but are just utilized less, please learn more about how to scale down Azure VMs on a schedule.
Scheduling the start and shutdown of VMs allows you to save money on Azure costs. A VM that has been shutdown and deallocated does not incur any Azure charges (except for the space it occupies in blob storage). Shutting down VMs is usually beneficial for DEV/QA and other non-production environments, CI/build servers, or for production environments where access to VMs is required only during specific times.
Step 1 – Get a CloudMonix Account
You will need a CloudMonix account. If you have not yet registered, go here. CloudMonix is a pretty sophisticated monitoring and automation software for Azure. By using CloudMonix, you’ll have access to a ton of useful performance metrics, logs, alerts, integrations, and other automation features. While during the 2-week trial period everything in CloudMonix is free, after the trial expires, automated Startups and Shutdowns will only available for users of CloudMonix’s Ultimate plan. But many companies easily justify the relatively inexpensive cost of CloudMonix by configuring it to power-down their unused VMs.
However, if you want to shutdown and start Azure VMs on a true budget, you will want to learn about Azure Automation and Azure PowerShell. There are a few dozen blogs on this particular subject and we’ll link to them at the bottom of this article. Be aware, that you will still need to find ways to get alerted when Azure Automation Runbooks fail to run properly, otherwise you may end up with unpleasant surprises every once in a while.
Technical considerations to note: when a VM is shutdown its IP is deallocated. When it is brought back up, it will get a new IP unless it is assigned an Azure Reserved IP.
Step 2 – Connect CloudMonix to your Azure Subscription
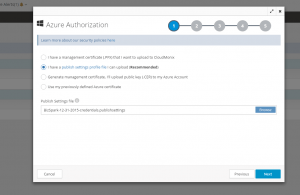
Ensure that your Azure Virtual Machines have been added to CloudMonix account. Simplest way to do so is to run thru the CloudMonix Setup Wizard. It takes a few minutes and it is very intuitive and straightforward.
Step 3 – Define Stop and Shutdown actions to execute at specific times
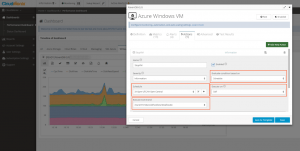
After Wizard completes, edit the monitoring definition of a particular Azure VM and on the Actions tab and define two actions; one to stop and one to start a VM at specific times. In detail:
- Bring up an Edit dialog for a specific Azure VM from CloudMonix dashboard
- On the Actions tab, add a new action. This will be the action to Stop the VM at a specific time
- Specify Name and Severity of the action
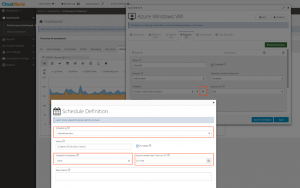
- Ensure that Action execution is based on a Schedule instead of an Expression
- Define a Start time of the action by creating a new Schedule entry of type Action Execution (keep in mind that the start time is defined in UTC). Schedule setup is quiet flexible and has many more scheduling options than Azure’s native Scheduler.

- Execution target should remain as “Self”
- Execution Command should be “AzureVmInstanceShutdownDeallocate”. This will deallocate the VM and stop charges from Azure
- Keep in mind that CloudMonix will also send out alerts in case of either success or failure of action execution
- Save and Done.
- Now rinse and repeat this process to create a similar Start action. Use “AzureVmInstanceStart” command and a different time schedule instead.
- Since the Schedule setup is quiet flexible, you are able to create any number of Start and Stop actions under a single resource to accommodate different schedules for weekdays and weekends, specific weeks of the month, etc.

Step 4 (Optional) – Automate other Virtual Machines quickly
Configuring other VMs to shutdown and start on the same schedule is a fairly trivial task in CloudMonix.
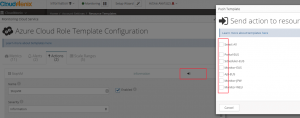
- Save the configuration of configured VM as a “Template”
- Navigate to Resource Templates screen under Account Settings and open the previously saved Template
- “Push” the StartVM or StopVM actions any other VMs in your monitored setup

Automating Azure Virtual Machines without CloudMonix
There are a number of excellent blogs that provide detailed instructions on how to use Azure Automation Runbooks or Scheduling Manager with Azure PowerShell to automate startup and shutdown of VMs. Here are a links to a few of them
- Shut Down Azure VM’s Automatically by Mario Brandan
- Using Azure Automation to automatically shutdown your dev VMs by Dan Gartner
- Automating & Turning Off / Shutting Down Your Azure VMs by Matthew J Bailey
- Using Azure Automation to run VMs during office hours only by Richard Kerslake
- Using Azure Automation to Start und Stop Virtual Machines on a Schedule by Carstenn Lemm
- Start and Stop Windows Azure VMs According to Time Schedule by Carstenn Lemm
- Scheduling Azure VM Startup and Shutdown using Azure Automation by Aidan Finn
- Azure Automation step-by-step guide for Auto-Shutdown Virtual Machine by Taehee Lee
- Azure Automation – shutdown azure virtual machine – step by step by Kunal Chandratre
- Use Azure Automation to Shut Down VMs Automatically by Graham Smith
- How-to start and stop Azure VMs at a schedule by Anders Lybecker





Leave A Comment