Azure SQL Database, also known as SQL Azure, is Microsoft’s database-as-a-service offering available on the Azure platform. It provides managed SQL database capabilities to applications running in the Azure cloud. Azure SQL Databases do not require deployment and installation of a dedicated VM, SQL Server software, and their associated maintenance. SQL Database is a “pay-as-you-go” service managed fully by Azure.
The tier of SQL Azure database controls how many compute/storage resources are allocated to the database and how much it costs. Moving between tiers allows SQL Azure administrators to control cost and match the power of a database to required demand.
Resources available for a single database are expressed in terms of DTUs (Database Transaction Units).
In this article, we’ll walk you through the example that shows how to automatically adjust the selected SQL Azure tier based on the actual DTU usage using CloudMonix.
1. Run CloudMonix Setup Wizard to connect to an Azure environment
If you aren’t using CloudMonix yet, sign up for a free account, then authorize CloudMonix to view your Azure subscription. Learn more about the setup process here.
To connect to SQL Azure you’ll need to specify database connection strings and provide credentials with “ALTER DATABASE” permissions. You may also need to adjust your firewall settings to allow CloudMonix to connect. See this article to learn more.
2. Define automation rules to auto-scale SQL Azure
CloudMonix can automatically move SQL Azure database between the tiers according to user-defined conditions. In the example below, we assume that the database needs to scale between Premium tiers (P1, P2, P4 or P6), adjusting the tier based on the actual DTU usage.
Note: When defining auto-scaling rules, keep in mind that some tiers have a different maximum capacity. An attempt to scale down to tiers that do not support current database size will result in an error.
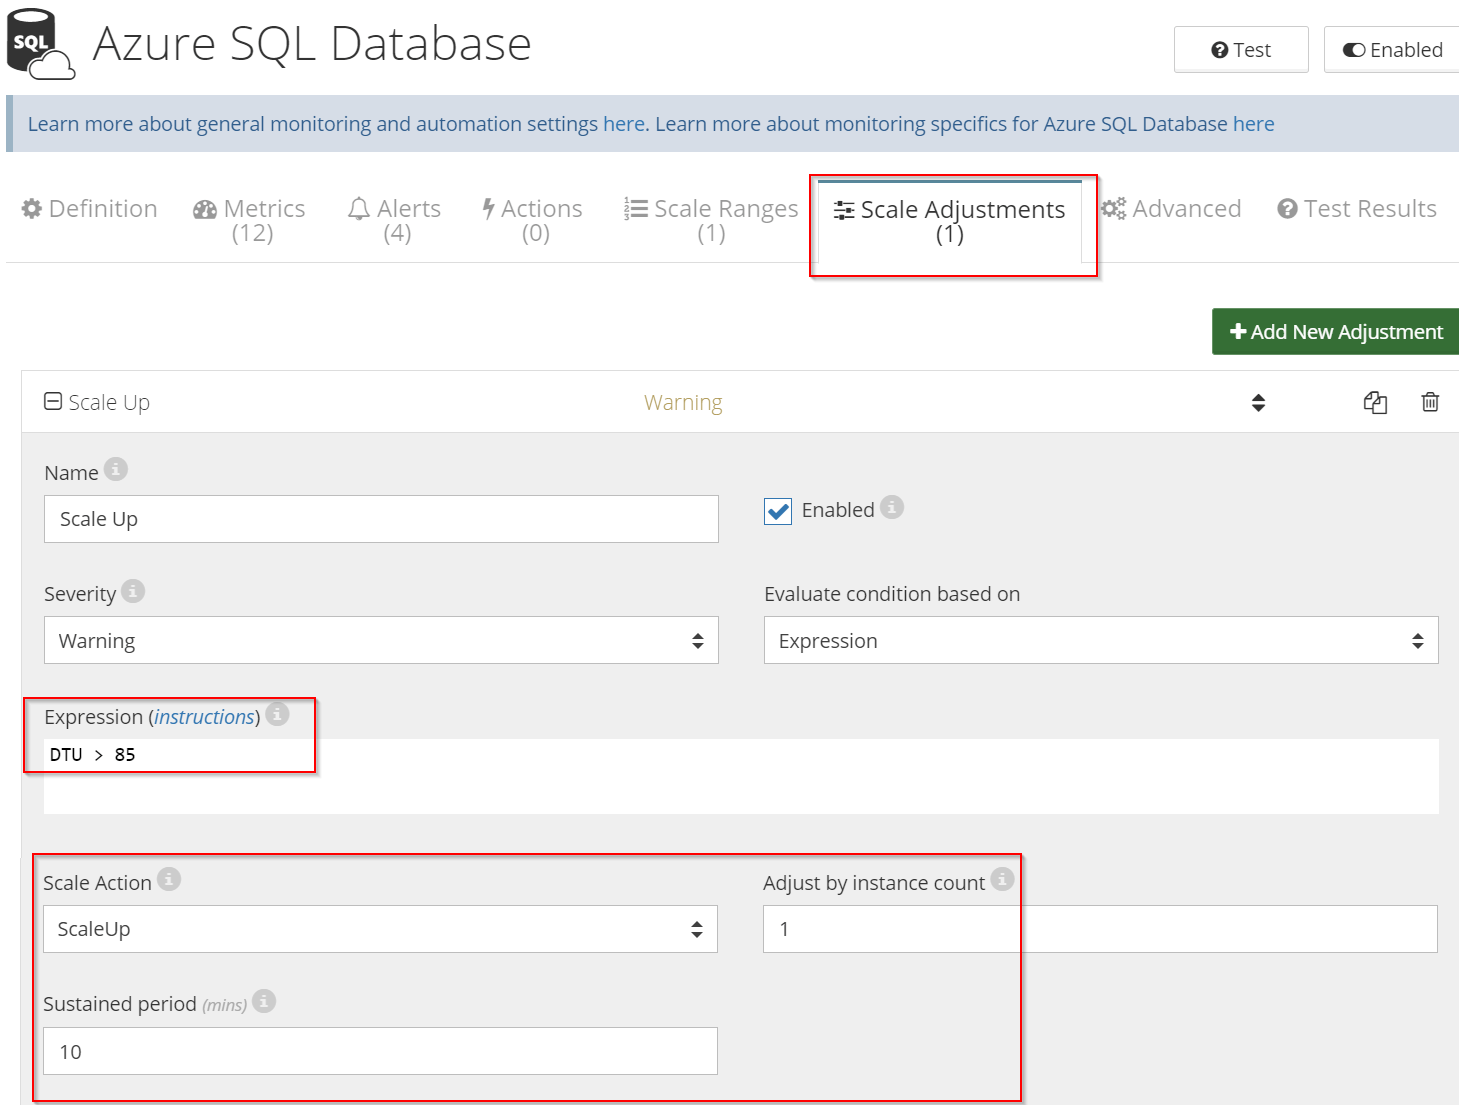
After Setup Wizard has been successfully completed, CloudMonix will track the current DTU usage as a metric called DTU. Creating two scale-adjustment rules can move SQL Azure database between tiers:
- Open Configuration dialog for the Azure SQL Database resource
- On the Scale Adjustments tab add a new action that will execute the Scale Up command when the DTU utilization exceeds 85% for 10 min. sustained. The “Adjust by instance count” parameter specifies by how many tiers CloudMonix will scale the database (screenshot below).
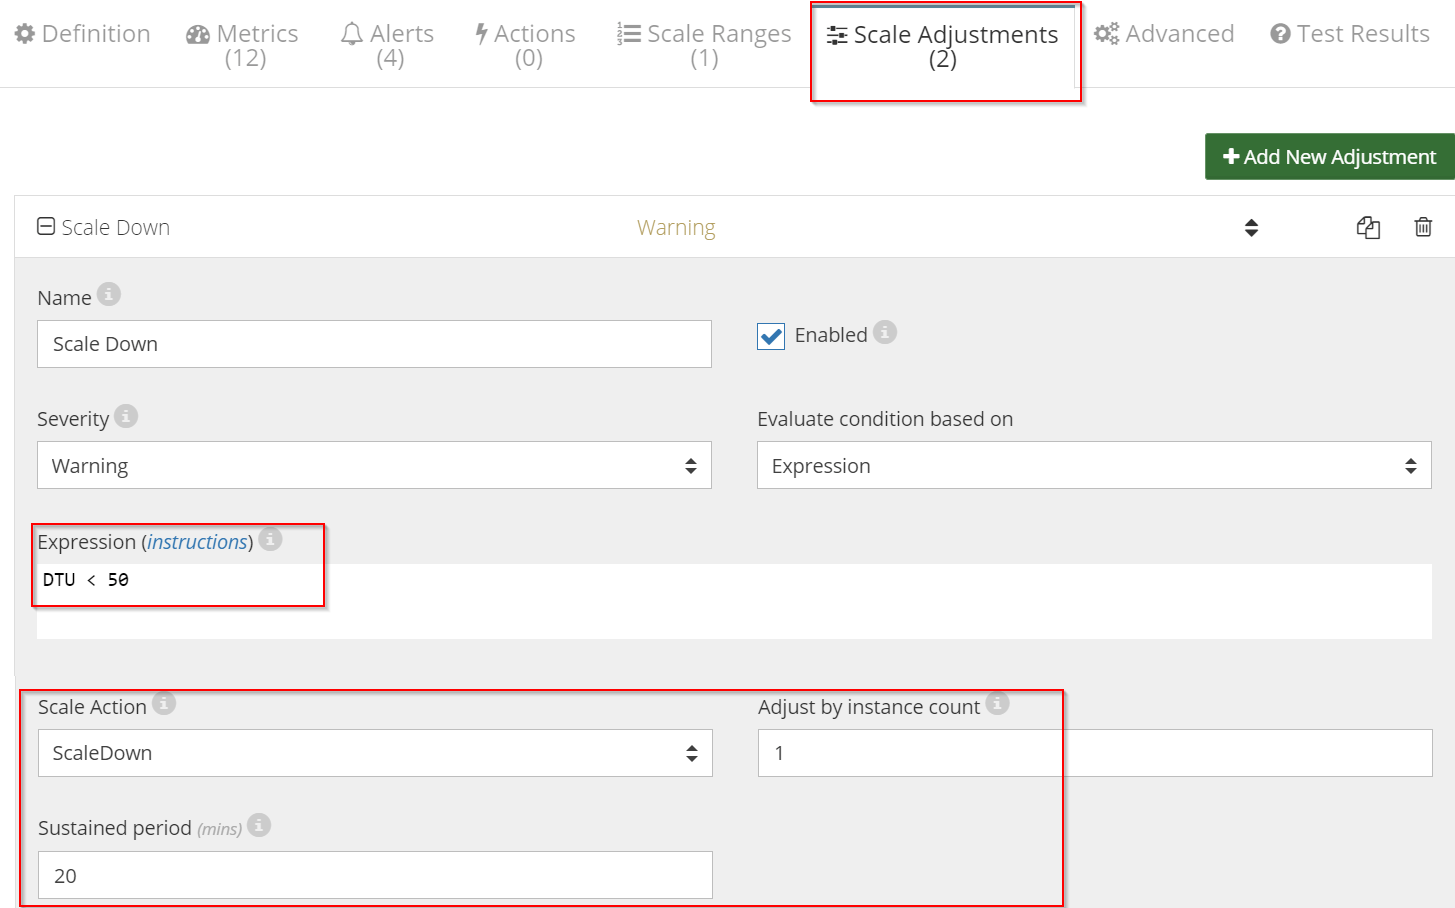
- In the Scale Adjustments tab add a new action that will execute a Scale Down action that utilizes ScaleDown command when the DTU utilization drops below 50% for 20 min. sustained (screenshot below).
3. Define an overall scaling limit
It might be beneficial to ensure that CloudMonix never scales your database higher or lower than certain tiers. This can be done by defining “Scale Ranges“.
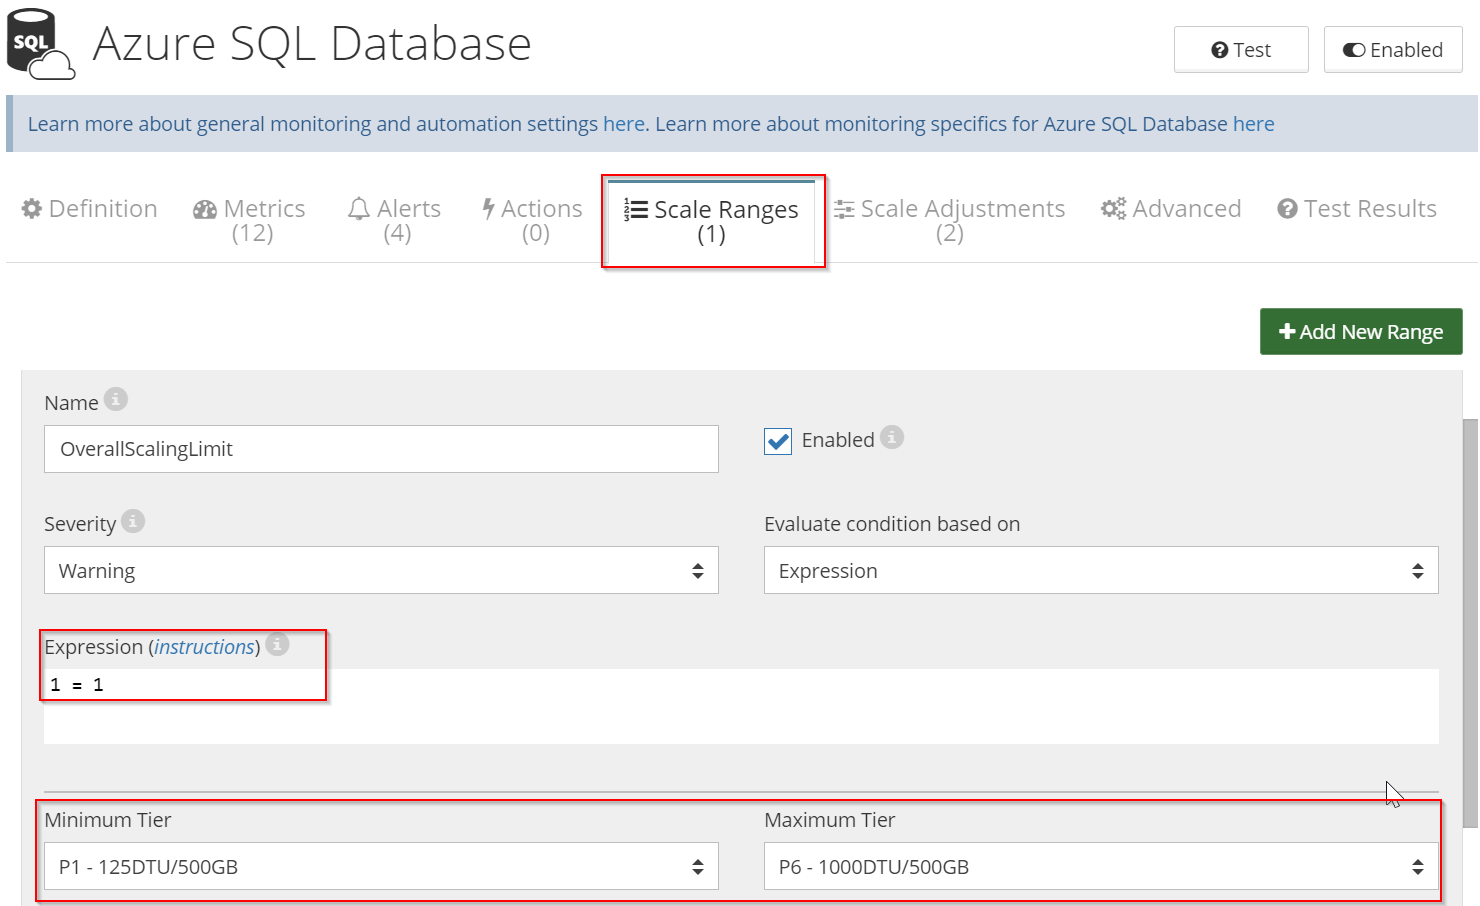
The following example shows how to ensure that a SQL Database can never be scaled below P1 and above P6 tiers.
- Open the Configuration dialog for the Azure SQL Data Warehouse.
- In the “Scale Ranges” tab define a new rule limiting the tier from P1 (Minimum Tier) to P6 (Maximum Tier). Specify a condition that is always true, e.g. “1 = 1”.
A similar approach can be used to automatically scale resources based on other parameters or according to schedule, for example here we show how to automatically pause SQL Data Warehouse every day to save on costs.


Leave A Comment