
In this blog post, we are going to cover how to import the private key to Windows Azure.
In this technique, there is a role of the Windows Azure administrator who is the private key holder. His main task is to:
- Make the private/public key pair and select a password to secure the private key
- Backup the private key and password
- Install the private key to the Windows Azure Certificate Store
Since the Windows Azure manager has access to the private key, he can decode the connection string and figure out the password to the production database. He has the same access to the code running on Windows Azure.
Importing the Private Key to Windows Azure
As the Windows Azure administrator, you need to upload the private key to Windows Azure. Here are the steps to do that:
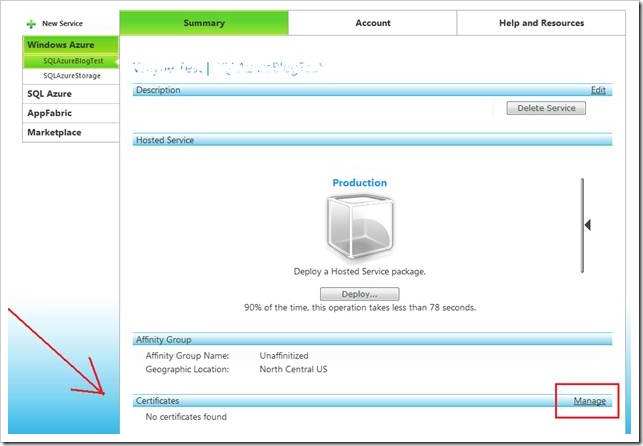
- Navigate to the Windows Azure Developer Portal.
- Select the Hosted Service component to deploy to. Under the Certificates heading, select Manage.
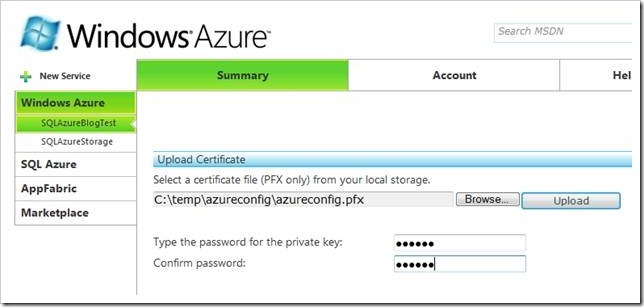
- Upload the private certificate and use the password used when creating the private certificate
- Copy the thumbprint given by Windows Azure to your clipboard; you will need this for the web.config file.

The thumbprint is a hexadecimal string that contains the SHA-1 hash of the certificate. This can be used by the code running on Windows Azure to gain access to the private keys installed on Windows Azure. This can be used in our web.config to tell the custom encryption provider the certificate that was recently uploaded. There is nothing secure about the Thumbprint, as it can be seen by everyone but only code with access to the private key can decrypt the connection string.


Leave A Comment